Interface Overview
The Project Succession interface is designed for efficient pipeline creation with a clean, modern layout. This guide will help you understand each part of the interface.
Main Window Layout
The interface consists of four main areas:
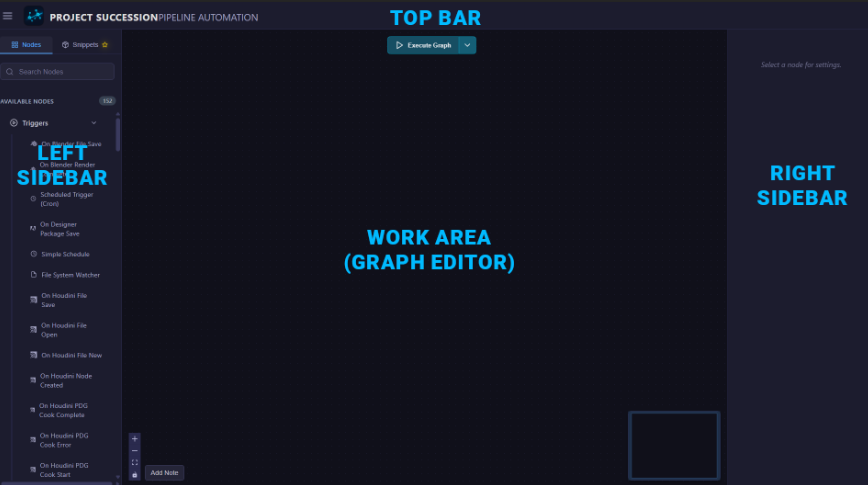
Top Menu Bar
Located at the top of the window, the menu bar provides access to:
- Hamburger Menu (☰): File operations, settings, help, and more
- Project Title: “PROJECT SUCCESSION - PIPELINE AUTOMATION”
The menu bar gives you access to all major functions. See Menu Reference for details.
Left Sidebar
The left sidebar is your node palette, containing all available triggers and actions. It features:
- Tab Selector: Switch between “Nodes” and “Snippets” tabs
- Nodes Tab: Browse and drag nodes onto the canvas
- Snippets Tab: Access saved graph snippets (Studio plan feature)
- Solutions: File Editing, managing etc.
- Search Bar: Quickly find nodes by name or category
- Node Count: Shows total number of available nodes
- Collapsible Categories:
- Triggers: Event detection nodes (file changes, time intervals, etc.)
- Actions: Task execution nodes (file operations, API calls, etc.)
- Resizable: Drag the right edge to resize
Using the Node Palette
- Browse: Click category headers to expand/collapse
- Search: Type in the search bar to filter nodes
- Add to Canvas: Drag a node from the sidebar onto the work area
Work Area (Graph Editor)
The central canvas where you build your automation pipelines:
- Infinite Canvas: Pan and zoom to create complex workflows
- Node Placement: Drop nodes from the sidebar or via quick search (pressing space)
- Connection Edges: Draw connections between node ports
- Visual Feedback: Nodes glow during execution
Canvas Navigation
- Pan: Click and drag on empty canvas space
- Zoom: Scroll wheel to zoom in/out
- Select: Click nodes or drag a selection box (hold shift)
Right Sidebar
The properties panel shows infos when you select a node:
- Node Label Editor: Rename the selected node
- Description: Shows what the node does
- Parameter Inputs: Configure the node’s behavior
- Retry Logic: Allows retrying failed nodes (Business Plan feature)
- Resizable: Drag the left edge to resize
- AI Assistant: A chat window for AI assistance with context of the Application (Studio Plan feature)
Parameter Types
The right sidebar displays different input types based on the selected node:
- Text inputs
- Number inputs
- Checkboxes
- Dropdowns
- File pickers
- Color pickers
- Advanced editors (Curves, etc.)
- And more…
Different nodes have different parameter types depending on their function.
Console Window
The console is a separate window that shows execution logs. It tells you what is going on, on the backend/service:
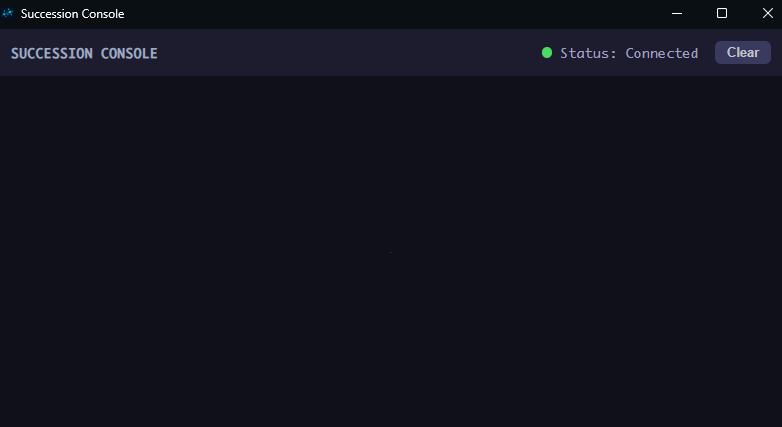
- Access: Menu → Open Console
- Always on Top: Stays visible while you work
Next Steps
- Working with Nodes - Learn to create and connect nodes
- Keyboard Shortcuts - Speed up your workflow
- Menu Reference - Explore all menu options